Team Master In Alternative Namespace
Goal
The goal of this document is to show how to create a Team Master with CloudBees Core Modern in a different [Kubernetes] Namespace than where the Operations Center resides.
Audience
For anyone working with CloudBees Core Modern as an Administrator or Cluster Administrator.
Pre-requisites
- working installation of CloudBees Core Modern
- kubectl access to the cluster with sufficient rights to set permissions
- Helm installed
- CloudBees Helm Chart configured
- Kubectx installed
Prepare Helm
helm repo add cloudbees https://charts.cloudbees.com/public/cloudbeeshelm repo update
Process
- create & configure the new Namespace
- configure additional Kubernetes endpoint in CJOC
- create Team Master via Team UI using new Kubernetes Endpoint
Important
Unlike a Managed Master, we cannot choose the Namespace in which we want to create the Team Master. Not in the Teams UI nor in the Jenkins CLI. To achieve our goal, we leverage the Kubernetes Endpoint configuration with Master Provisioning.
Configure New Namespace
If we want the Operations Center to create our Team Master in a different Namespace, we have to create this namespace first.
That isn't enough; we also have to configure this Namespace so that Operations Center has the permissions to create resources. Additionally, we need to make sure that the new Team Master can create build agents (via PodTemplates) in the new Namespace as well.
Create Namespace
First, we create the Namespace via kubectl.
This sets the new Namespace as default.
Note
kubens is part of the kubectx tool.
Create Helm Values File
To configure the Namespace with everything the Operations Center and the to-be-created Team Master need, we can leverage the CloudBees Core Helm Chart.
The Helm chart has a built-in feature to generate the Namespace configuration for a secondary namespace. To do so, we need to set two values at least:
- Master.OperationsCenterNamespace=
${NAMESPACE} - OperationsCenter.Enabled=
false
In yaml form (namespace-values.yaml):
Note
Make sure that OperationsCenterNamespace is the Namespace your Operations Center is configured in. By default, it should be cloudbees-core.
Fetch Helm Chart
We then have to retrieve the Helm Chart itself, so Helm can use it for templating.
helm fetch \
 --repo https://charts.cloudbees.com/public/cloudbees \
 --version 3.8.0+a0d07461ae1c \
 cloudbees-core
Note
Make sure to change the version to reflect the version you've downloaded.
Create Namespace Configuration
We have the values and the Chart. We can now let Helm create the configuration via helm template.
helm template cloudbees-core-namespace \
 cloudbees-core-3.8.0+a0d07461ae1c.tgz \
 -f namespace-values.yaml \
 --namespace ${NAMESPACE} \
 > cloudbees-core-namespace.yml
!!! note Make sure to change the Chart filename to reflect the version you've downloaded.
Apply Namespace Configuration
Now that we have the complete configuration file of the Namespace, we can apply it via kubectl apply -f.
Configure Kubernetes Endpoint In Operations Center
Now that we have the Namespace configured, we can create a new Kubernetes Endpoint definition in Operations Center.
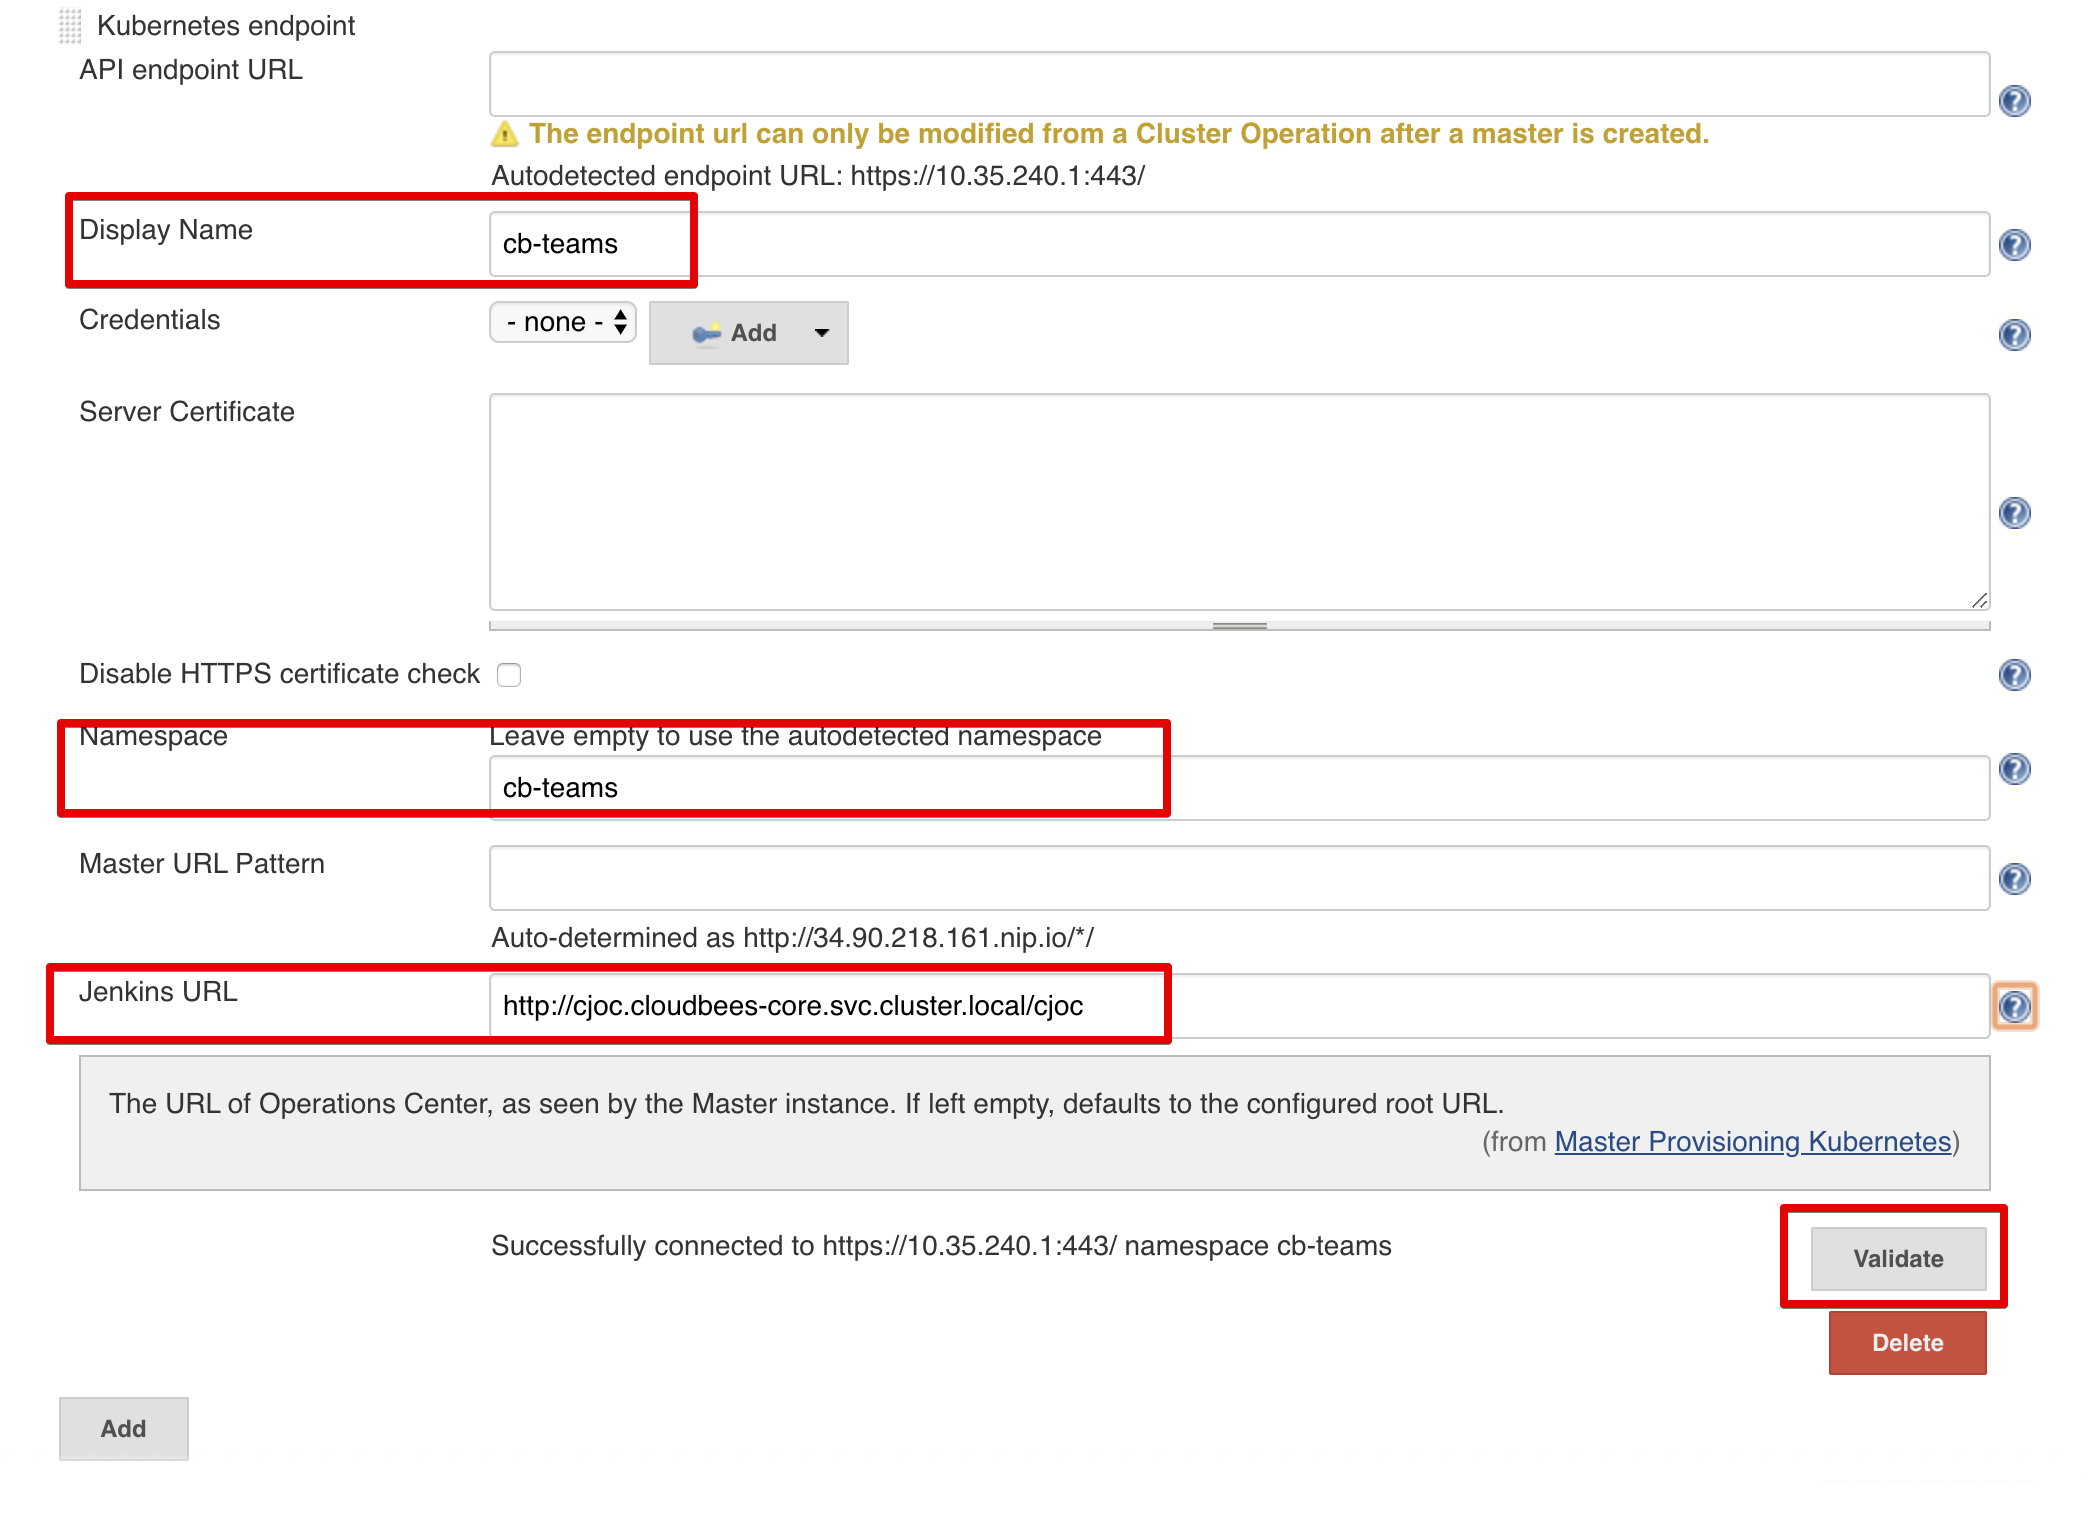
Go to Operations Center -> Manage Jenkins -> Configure System -> Kubernetes Master Provisioning and click Add.
Here we configure the endpoint. We change the namespace only, and stay within the same cluster, so we leave the following fields blank:
API endpoint URLCredentialsServer Certificate
You have to fill in the fields Display Name and Namespace, I'd recommend using the same value for both, the namespace we just created and configured.
We also have to fill in the field Jenkins URL, we can take the base name from the default endpoint (should be http://cjoc.cloudbees-core.svc.cluster.local/cjoc). We then have to add the namespace of where Operations Center is in, to the URL. Which in my case is, is in cloudbees-core. The end result being: http://cjoc.cloudbees-core.svc.cluster.local/cjoc.
Info
Make sure to hit the Validate button to ensure the configuration works.
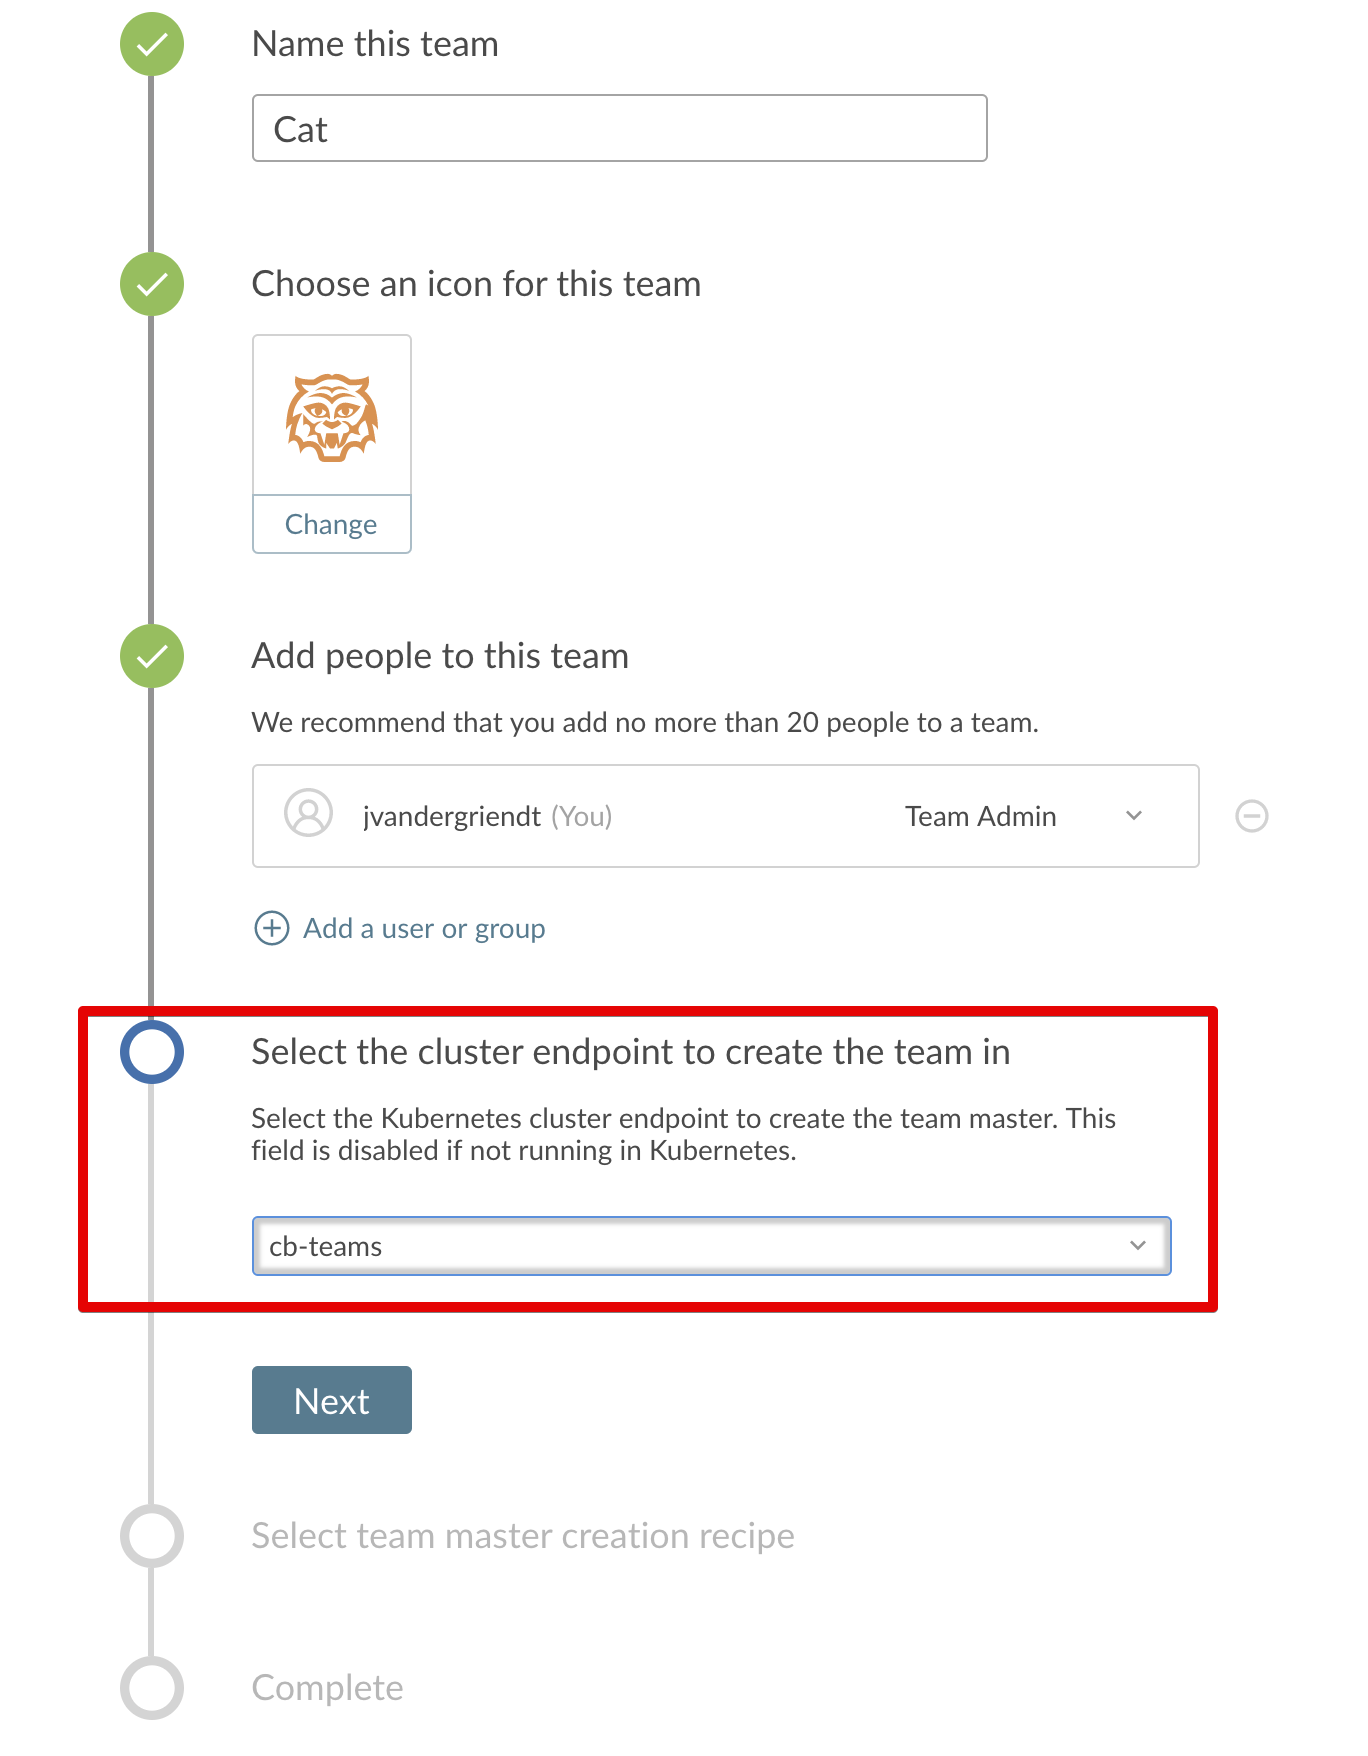
Create Team Master In Alternative Namespace
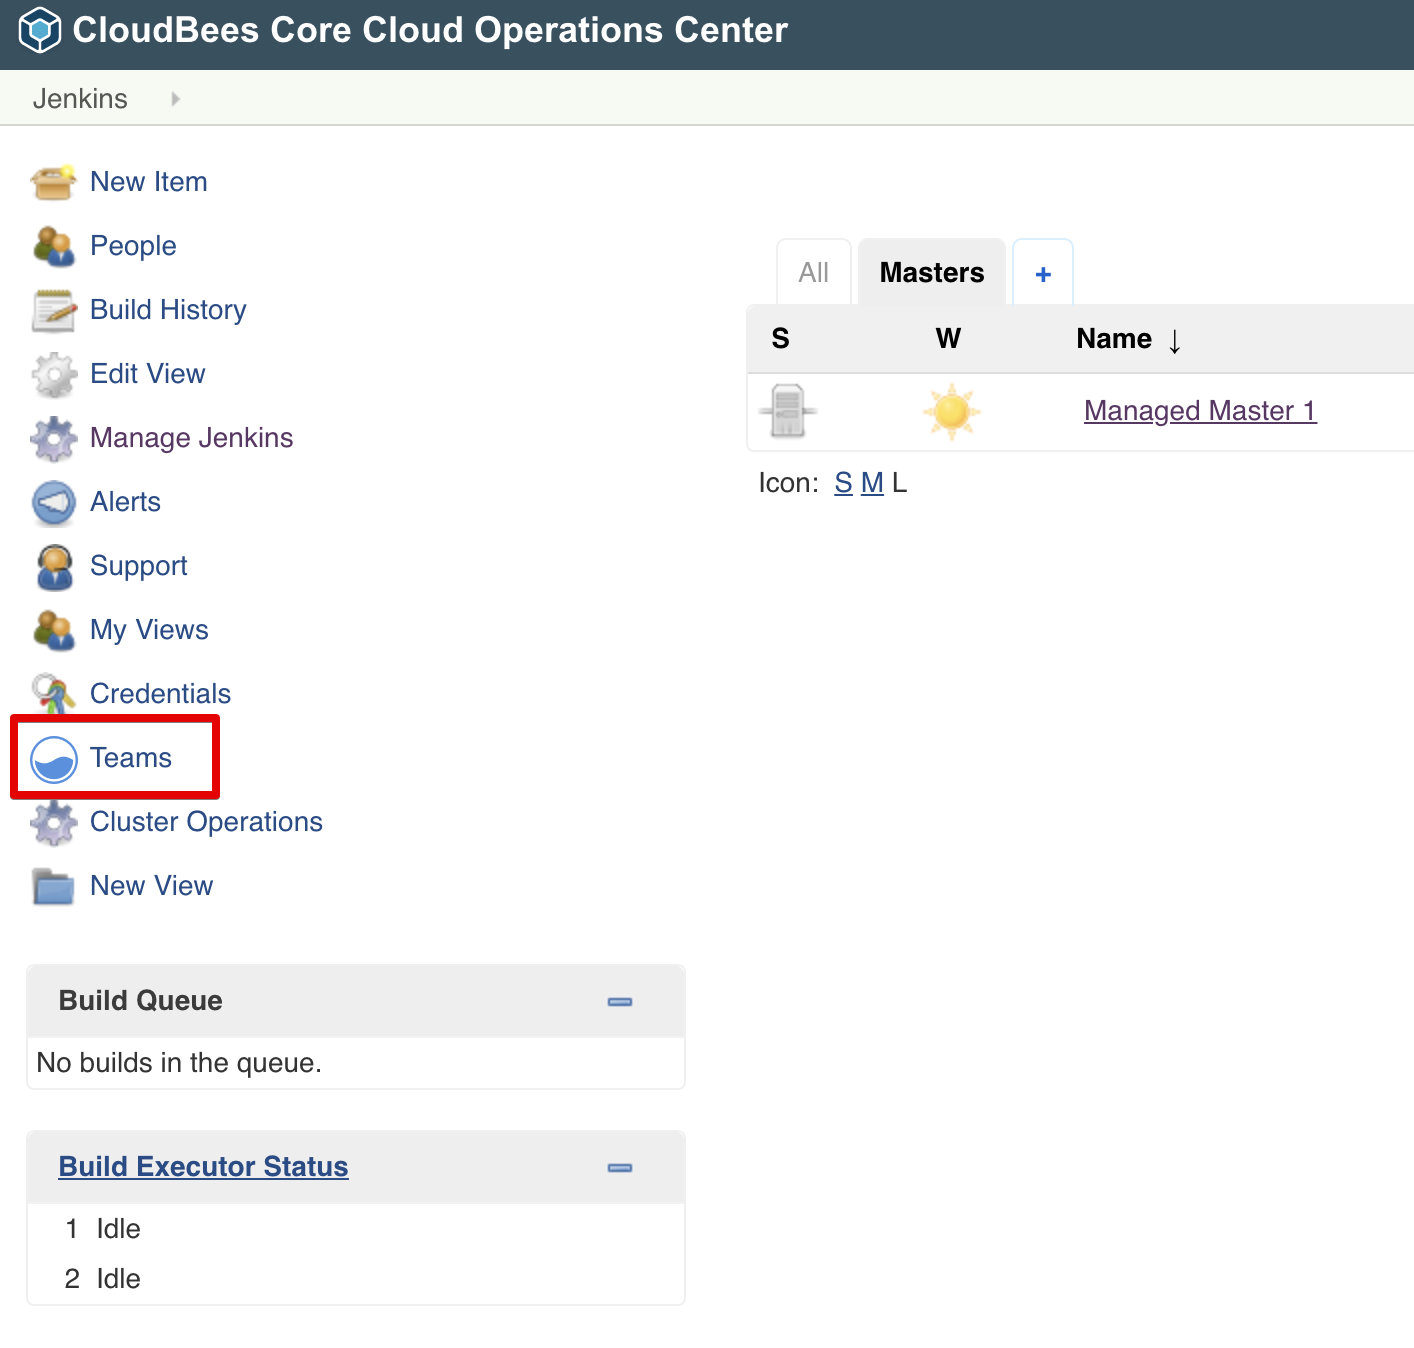
First, open the Teams UI.
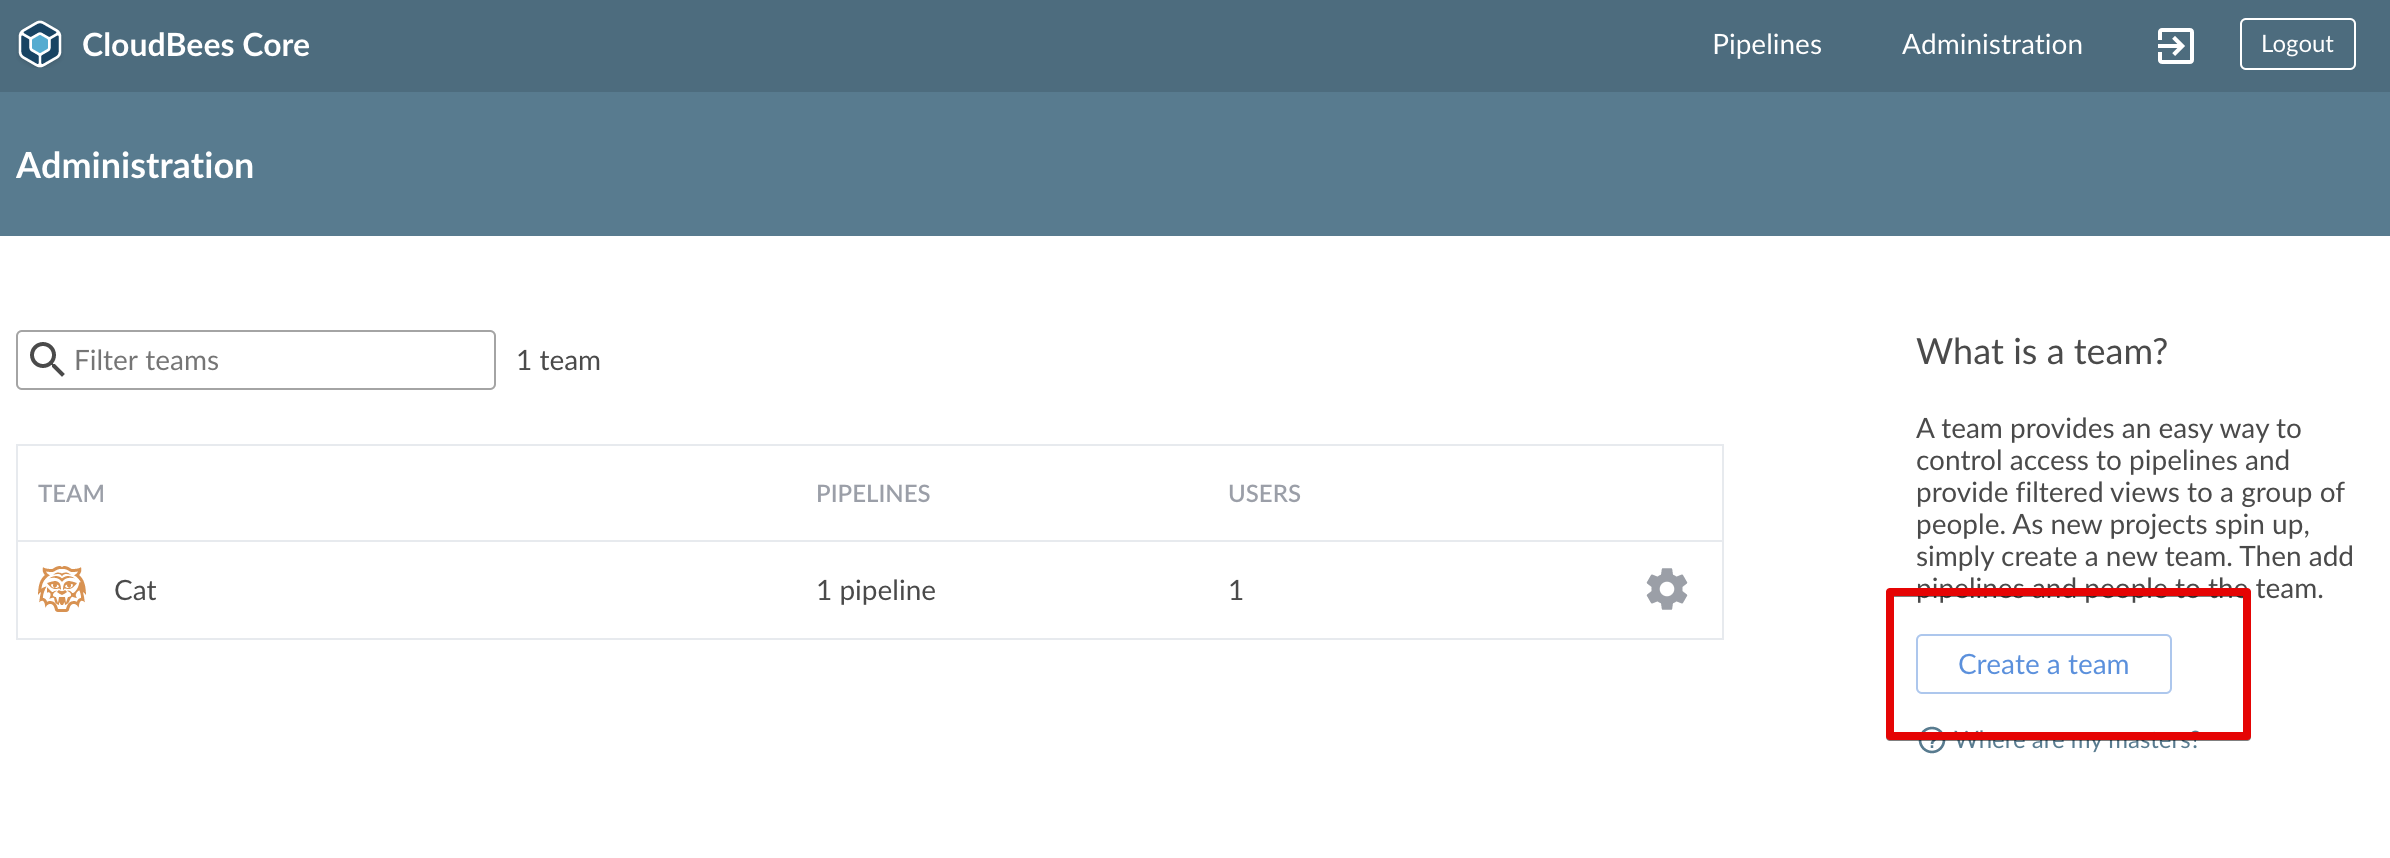
Second, start the New Team Wizard.
And finally, select your new endpoint.